The end of July
The system of London has been quiet for quite a few months now with no further incursions of gate builder ships by the Moe Clan. With the navy’s one mine layer on duty moving ordnance to some of the other colonies the mines in place around the Oxford jump point have not been replaced although the active sensors remain online.
At this time the Moe Clan are still classed as Neutral shipping as they have never made any overt aggressive moves and relations seem to be reasonably strong.
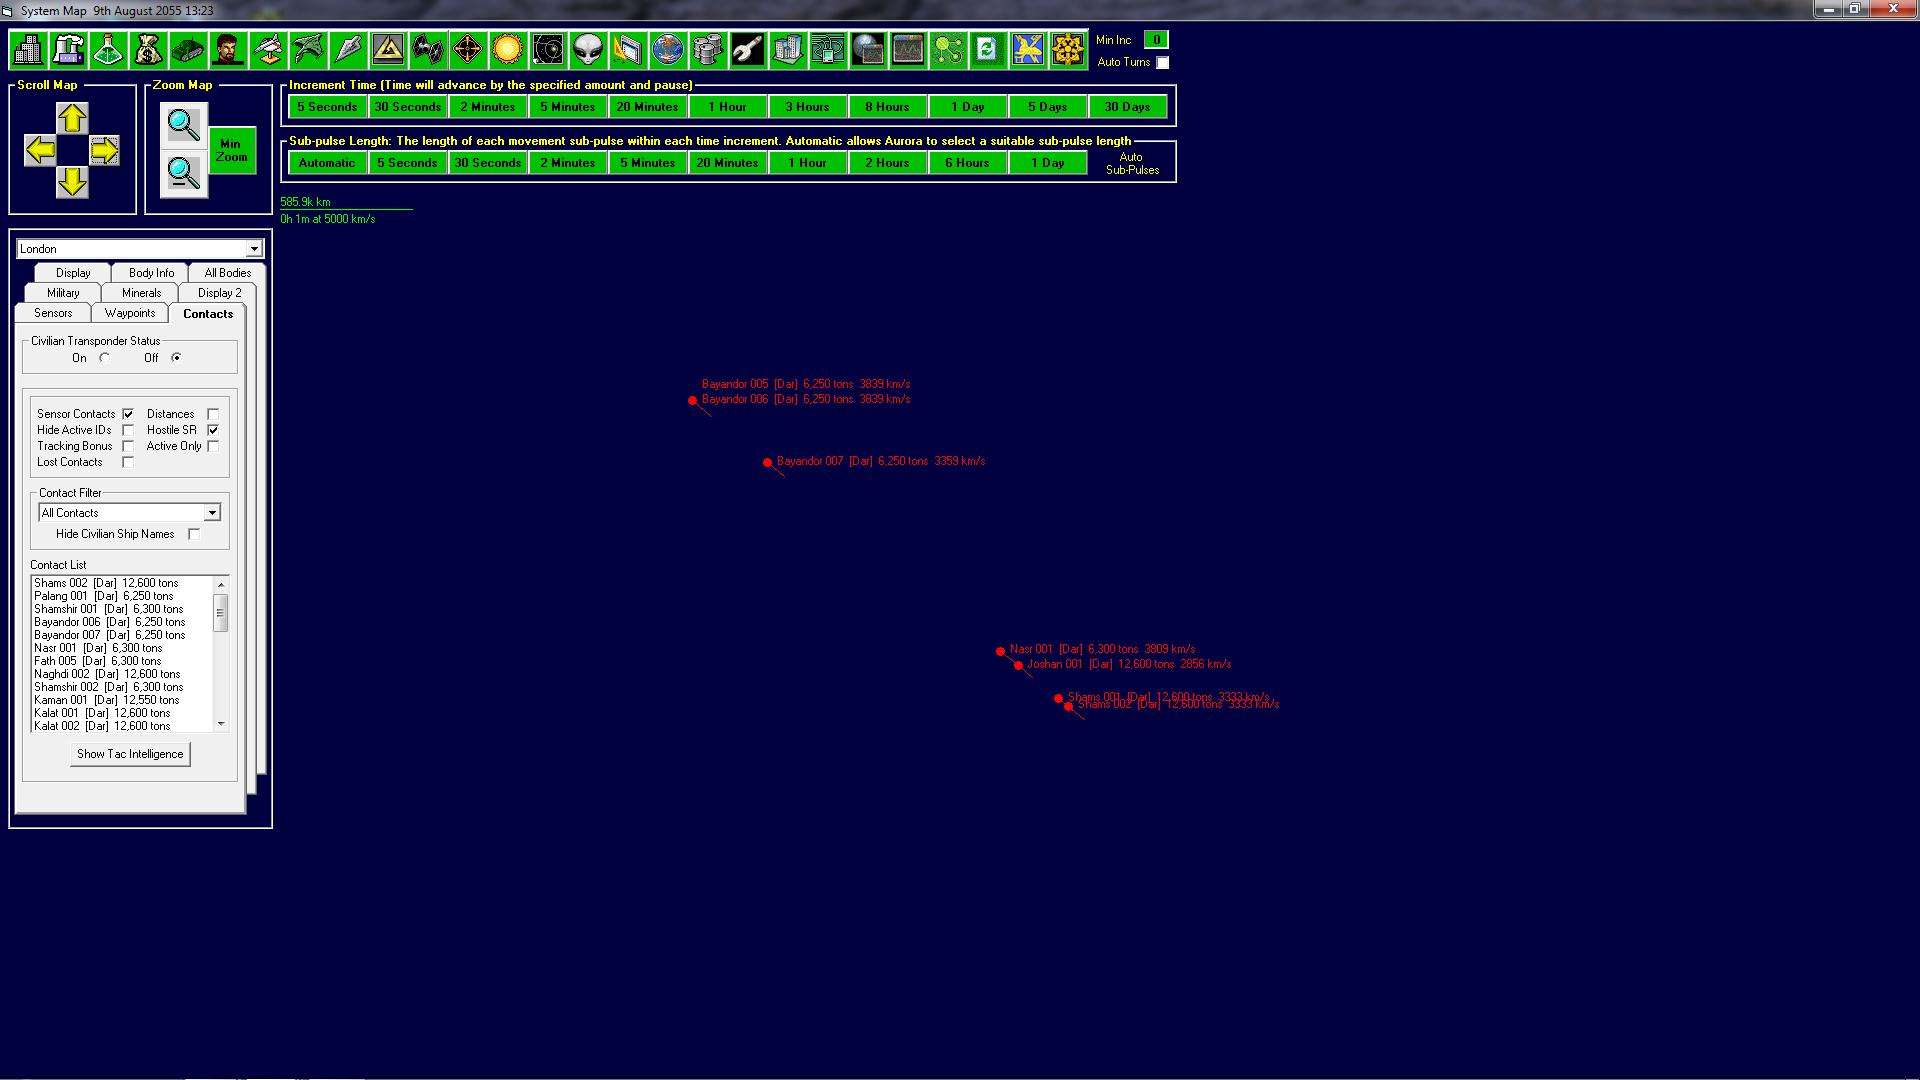
Late in the month the mines detect the transit of a number of new types of Moe Clan ships however, as they are neutral they pass out of contact range before the Navy has had time to properly analyse the signals.
Shortly thereafter a further jump is detected and this time the vessels are picked up as 6,000 ton fast movers. They are considered to be possible military ships and hence the Edward VII on the jump gate is ordered to follow them.
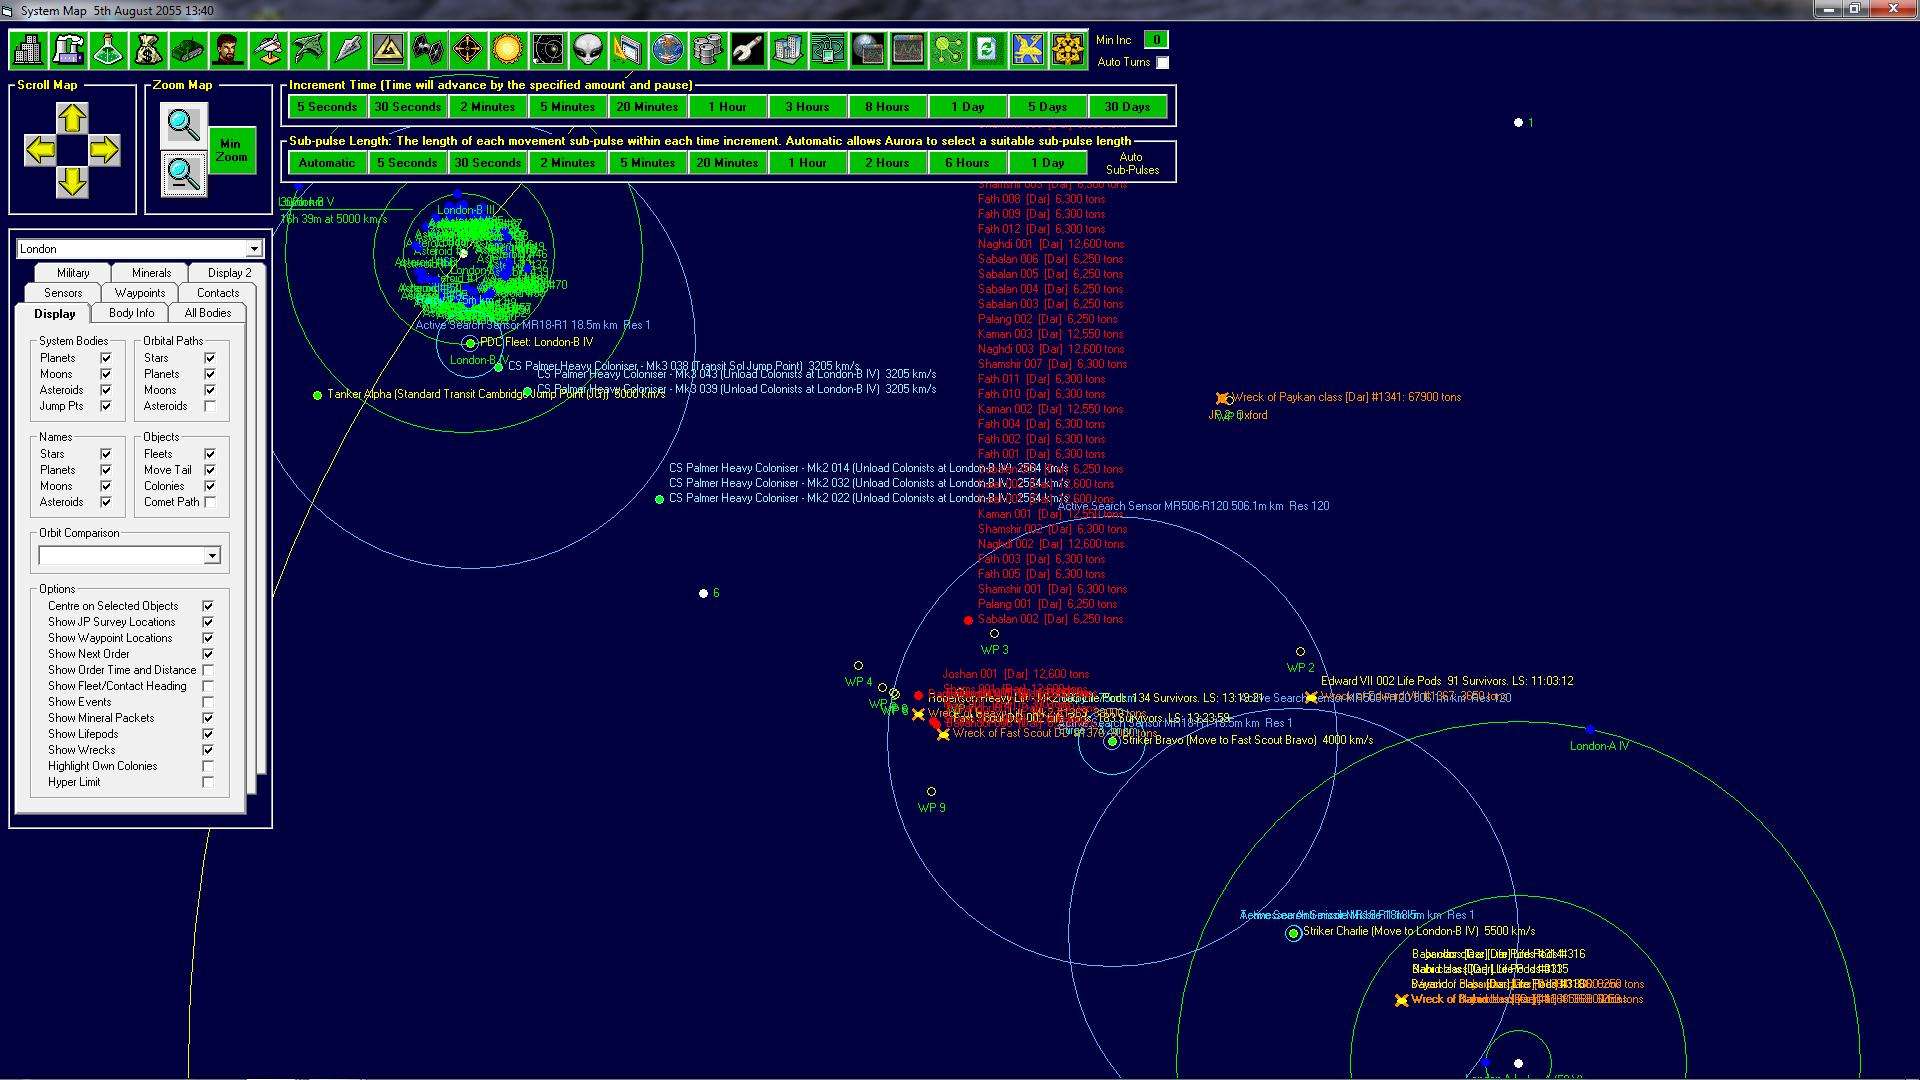
It’s not long before it become apparent that the ships are heading for the Sol jump gate. Concerned about having even Neutral combat ships in Sol Striker Bravo is order to move to London and intercept.
0208 16:08
Whilst moving to intercept, Striker Bravo detects the previous group off ships that made the jump, it’s another five fast movers any they are in turn heading straight for Sol.

Concerned with the number of potential hostile ships in system, the fast scout has been ordered to move in to help track the ships whilst Striker Bravo is given orders to destroy the incoming fleet and fight its way to the Oxford gate.
0308 04:38
As Bravo begins to engage the hostiles the tactical situation takes a massive turn for the worse with the arrival of a huge hostile fleet whose tonnage significantly outweighs that of the entire Imperial Navy.
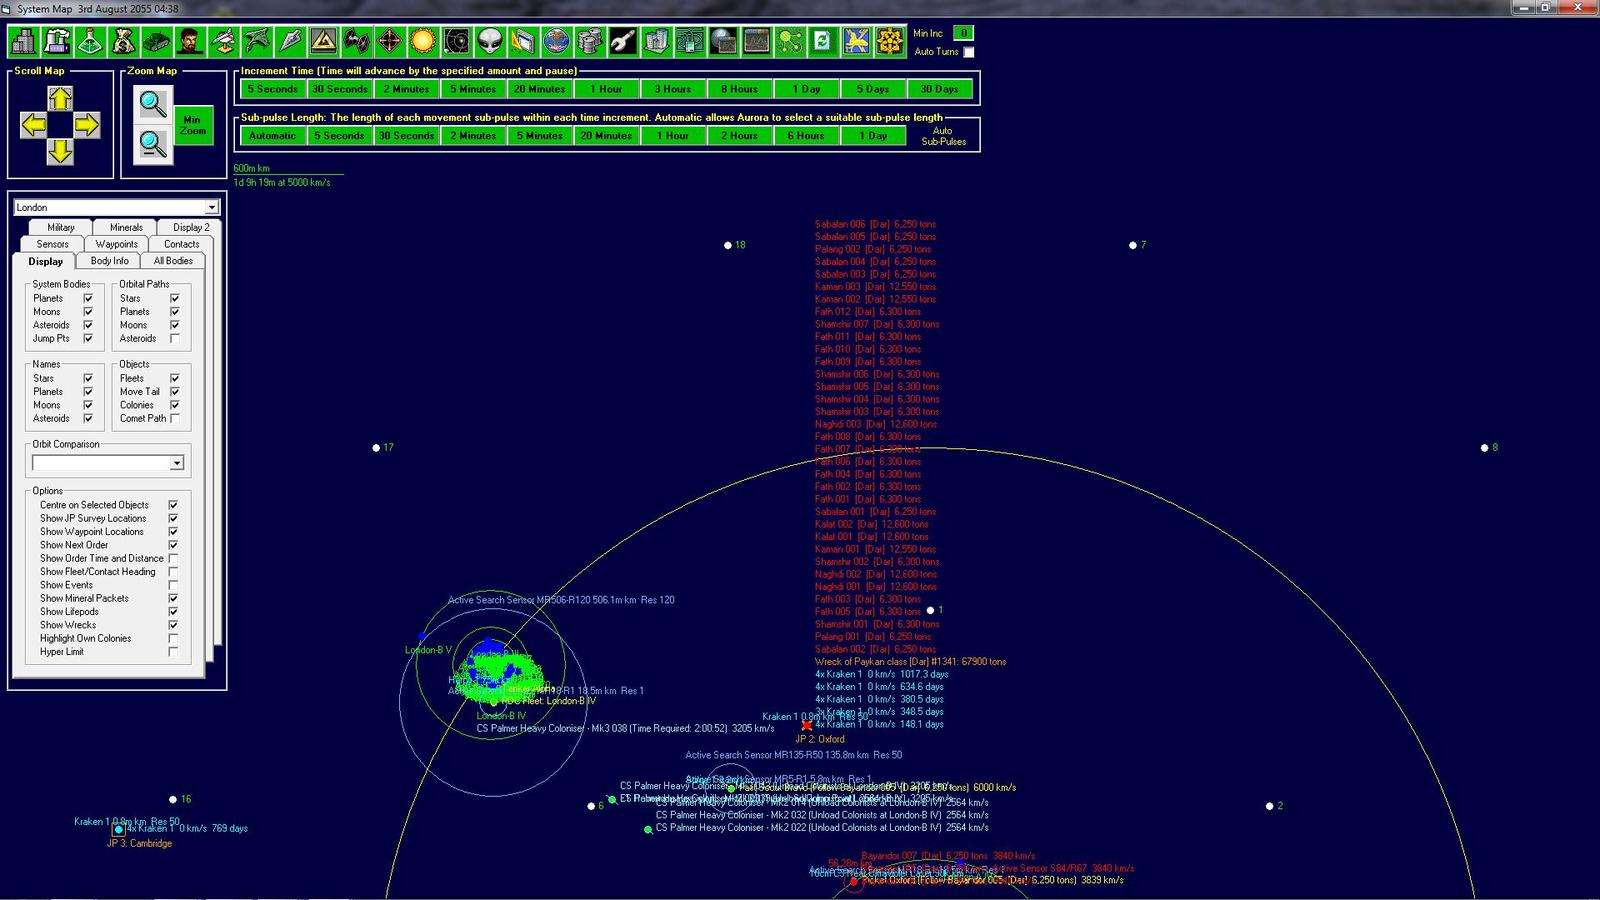
The Navy has only a single strike group in system and worse Striker Alpha, which has recently returned from a battle with the Precursors is currently in overhaul and won’t be back in service for a further 0.14 years – an age with the volume of hostile ships next door.
Bravo’s initial attack on the first hostile task group is a success and all ships are destroyed with no AMM fire encountered and only limited point defence fire.
However in the meantime, the Edward VII that was shadowing the second group has been unable to pull distance before hostilities began and has been destroyed by several waves of size 6 missiles. The ships own laser systems proved to be entirely ineffective in an ant-missile role.
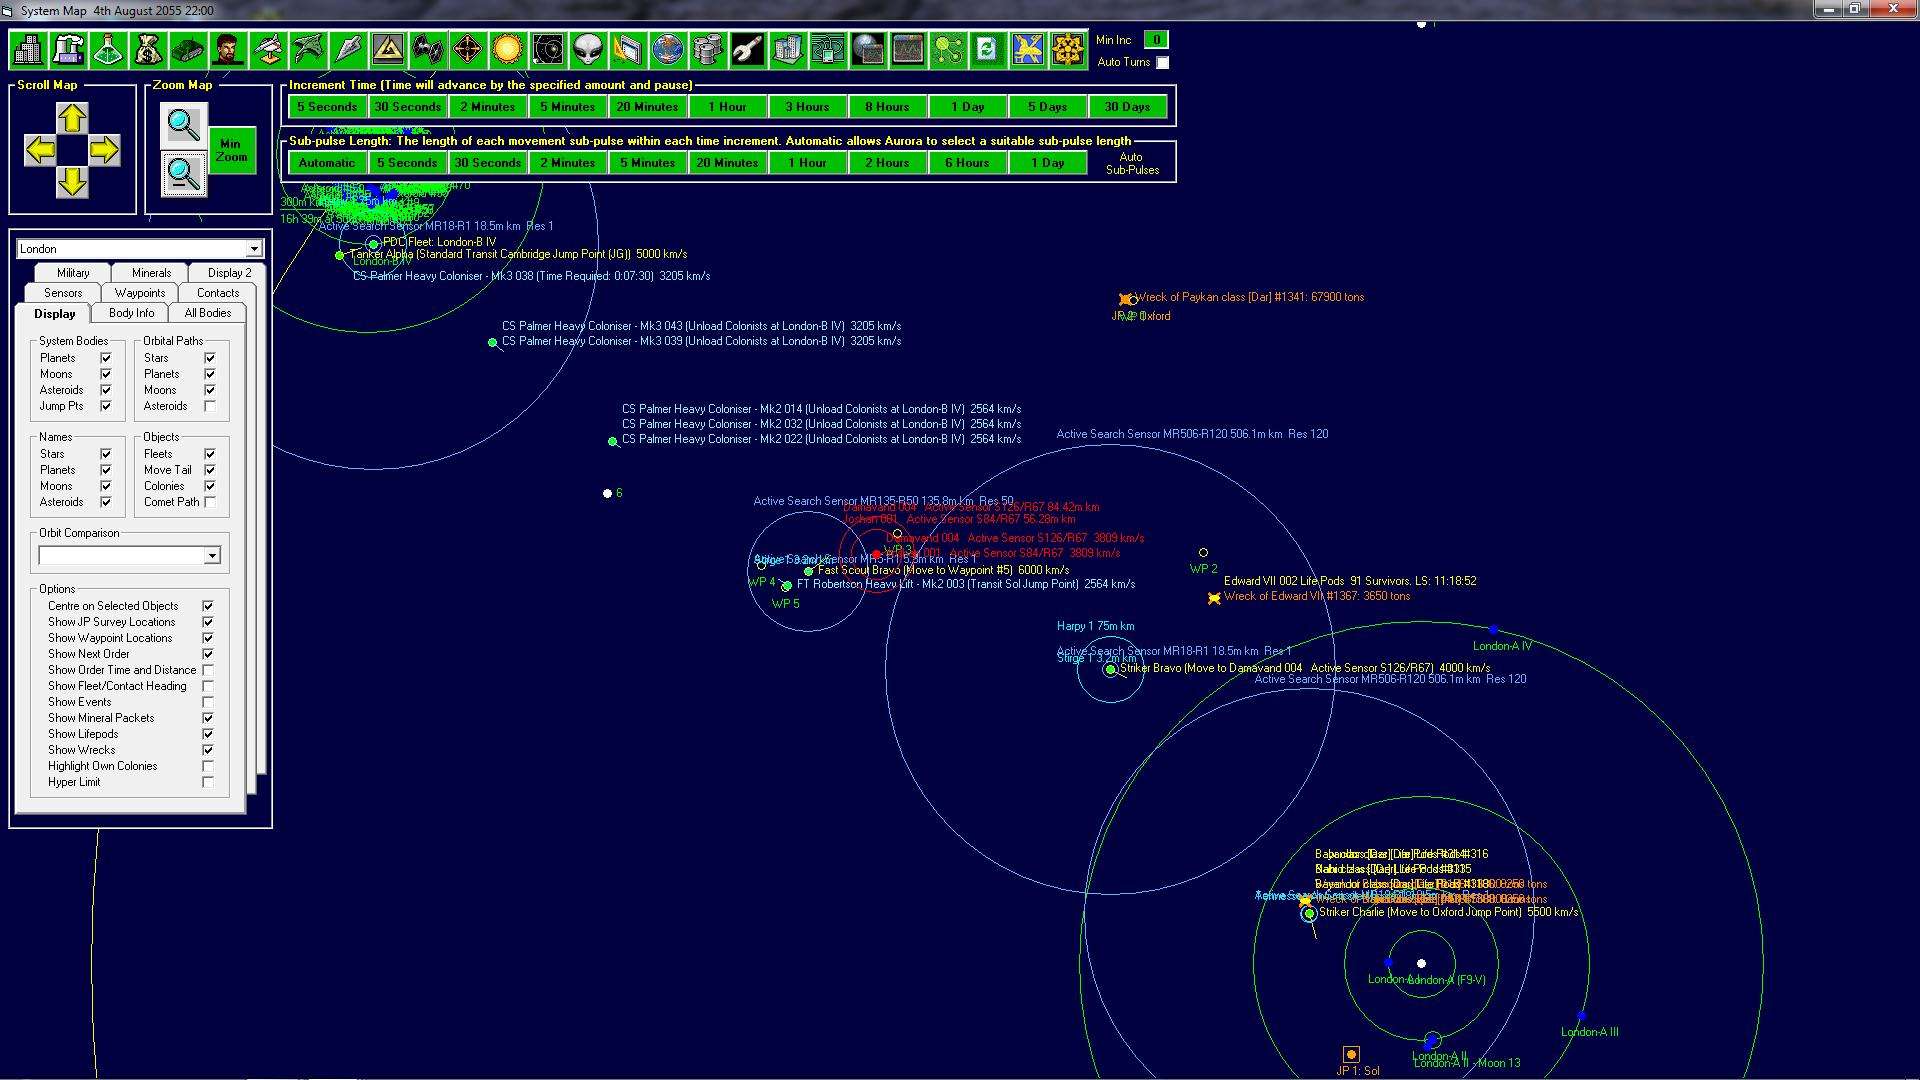
0408 22:00
The main hostile fleet destroys the mines on the Oxford jump gate with over 100 AMMs indicating that the fleet has significant defensive capabilities. With the loss of the mines contact with the main fleet is also lost.
Meanwhile the second group of ships appears to be moving towards some of the commercial shipping so the fast scout is moved to intercept and hopefully provide some cover with its’ own AMMs.
Given the size of the hostile fleet a new Strike group has been hostility put together on Earth comprising the four latest AMMs and one JP destroyer. Unlike the other AMMs in the Navy these ones are loaded with AMMs that have been salvaged from a Precursor world. Although having slightly less agility then the Stirge, they have a range of almost 18m k and its hoped the fleet, with its huge speed advantage can work to deter the main fleet whilst reinforcements arrive.
In the meantime Striker Bravo is set to intercept the second group of hostiles but with a speed advantage of less than 200 km/s it’s going to be a long haul for them.
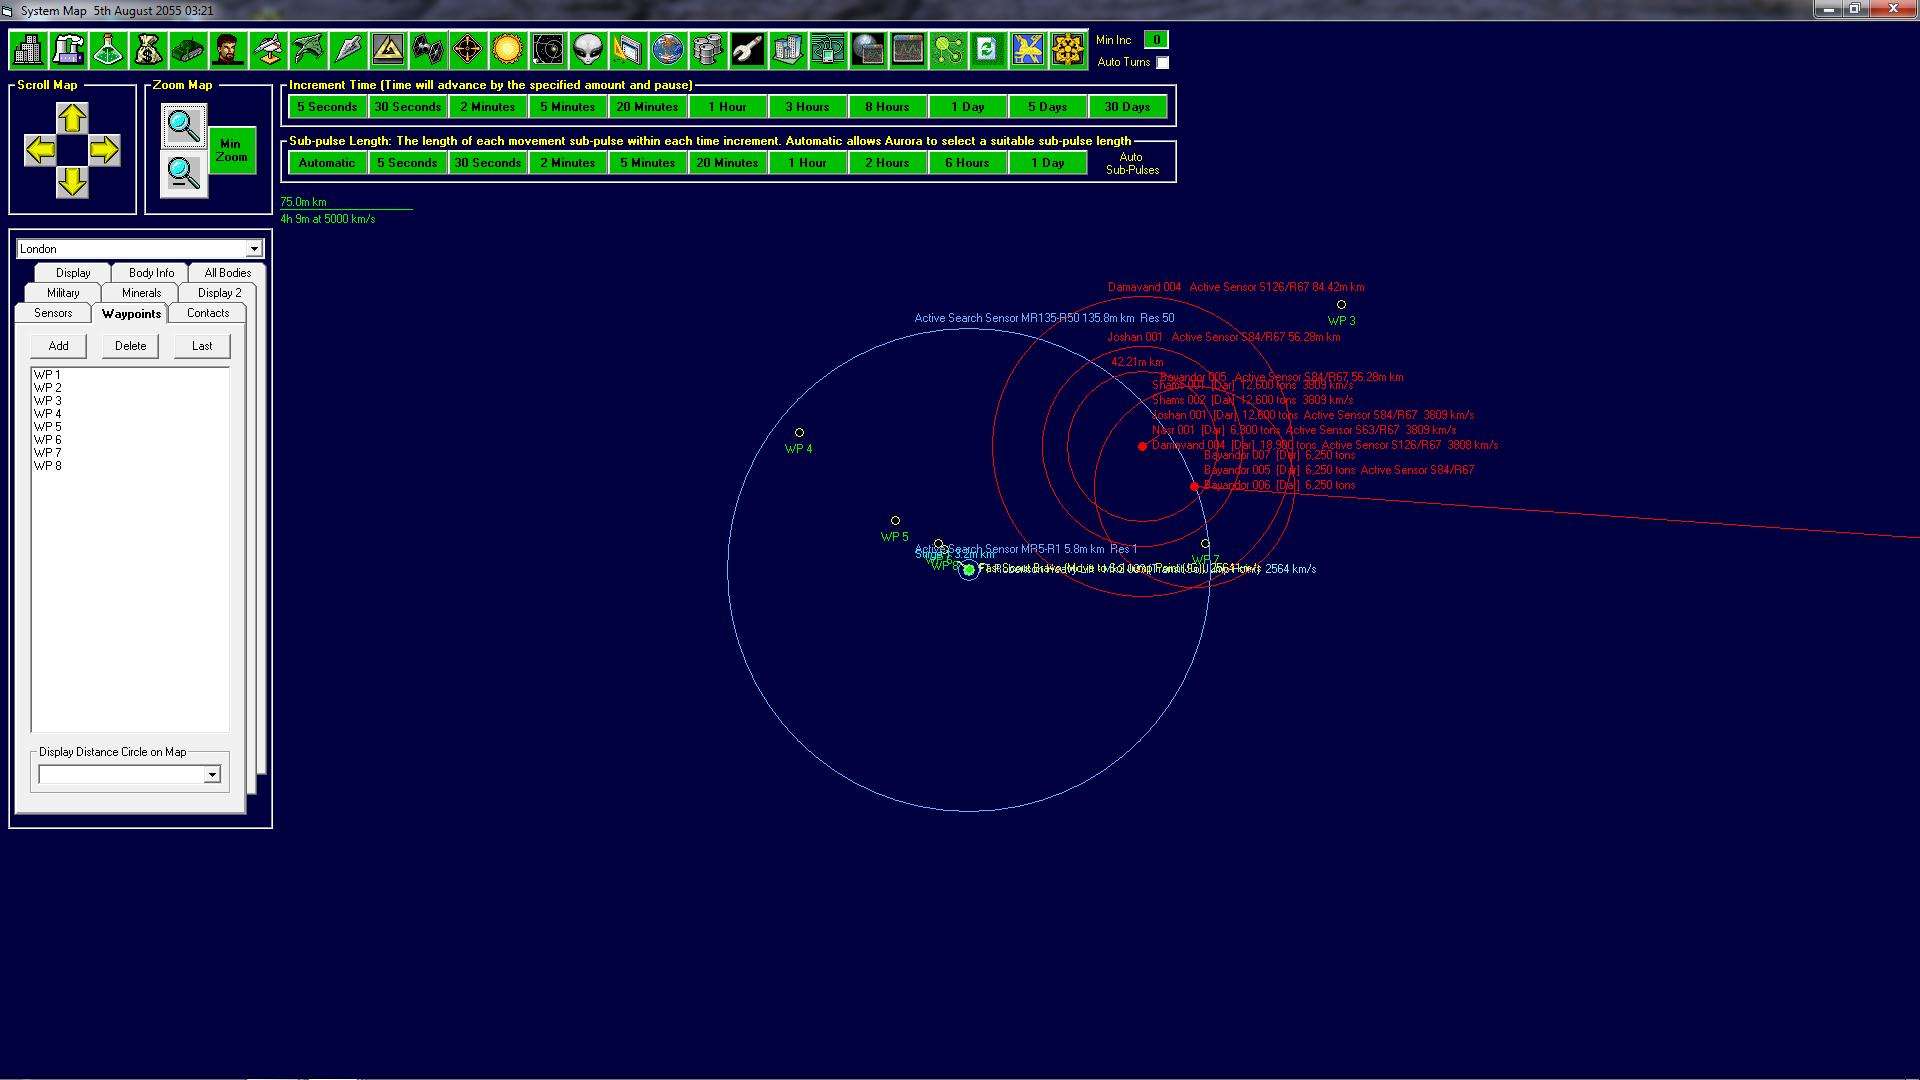
0508 03:21
Fast Scout attempts to provide some escort cover to a lone commercial freighter, however with it’s very limited 5 tubes there is not a lot of hope that it will have any success. The fast scout’s AM systems were never upgraded with the latest sensor package and as such will have only a few launch cycles against each incoming volley of missiles.
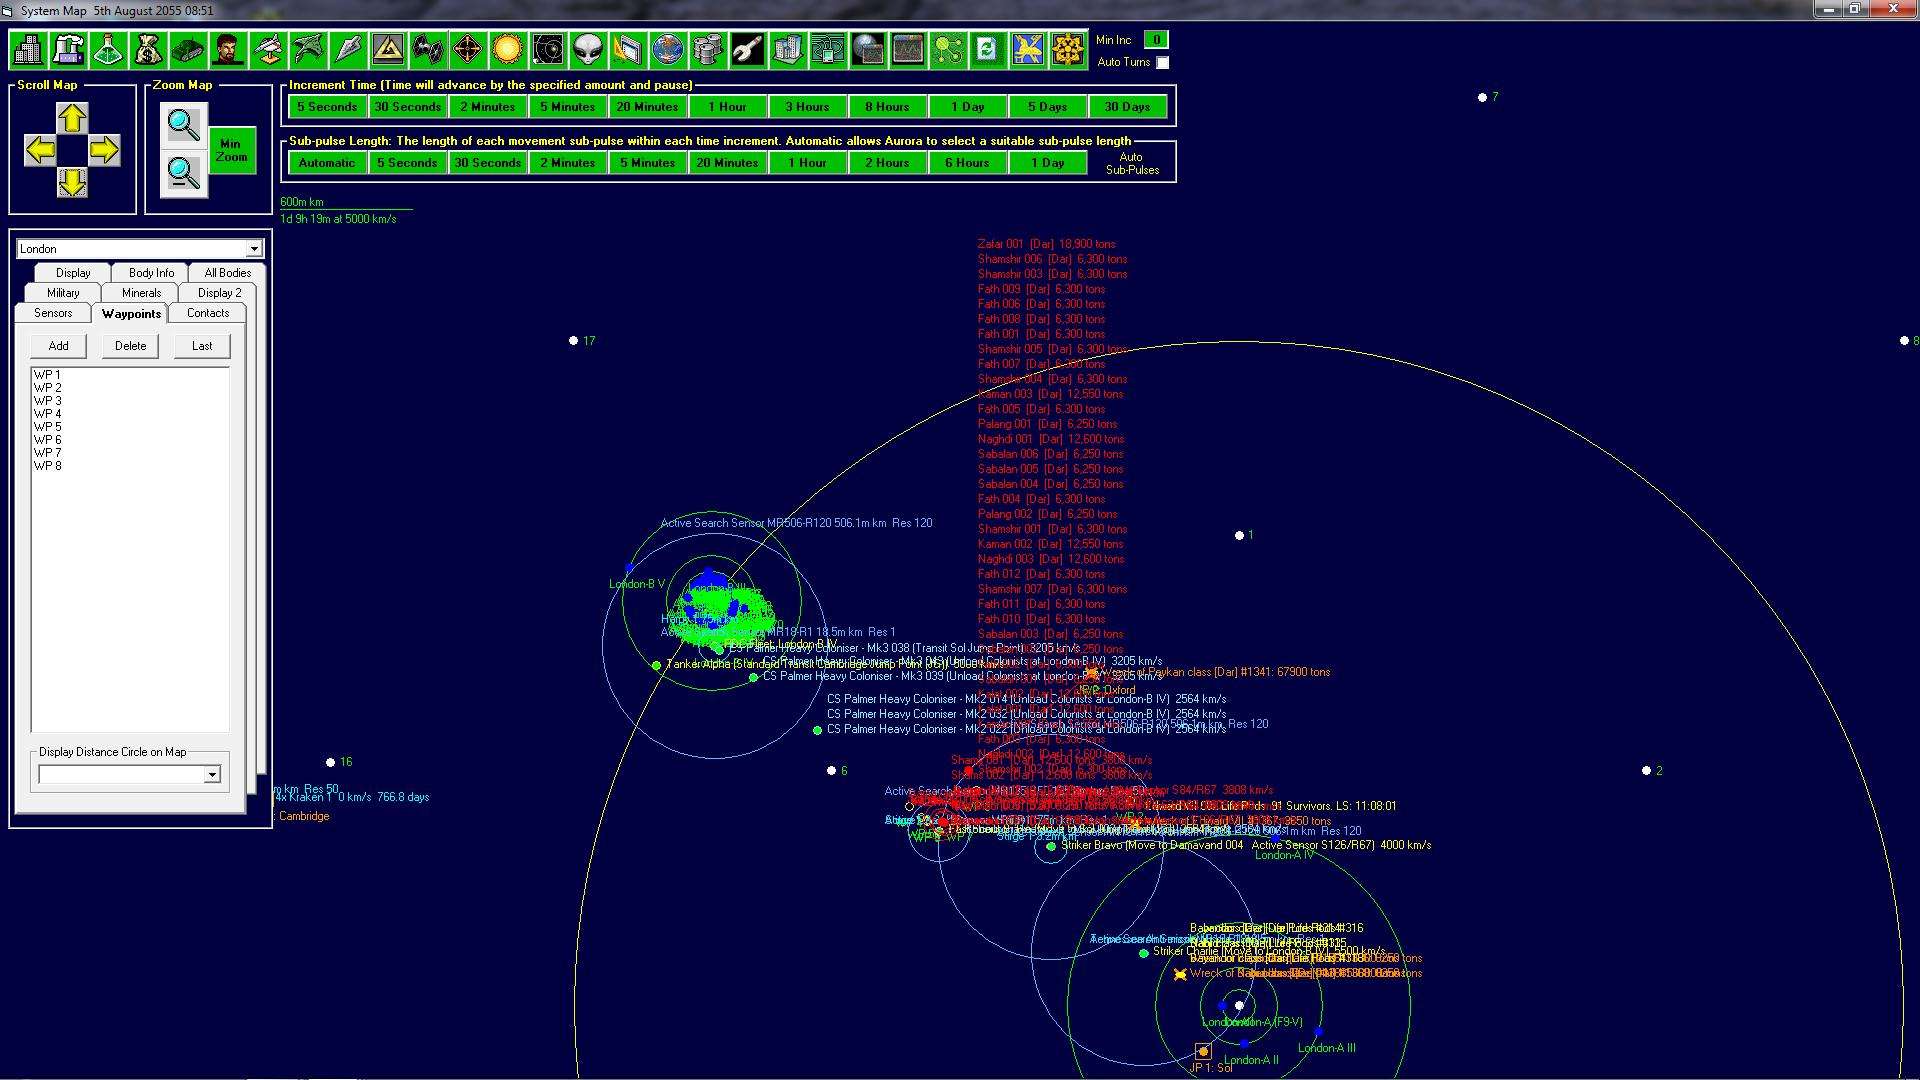
0508 08:51
The bulk of the hostile fleet is again sighted, they also appear to be heading towards the lone freighter.
0508 09:32
Initial missile volleys appear to be directed against fast scout so it’s ordered to accelerate to full speed in an attempt to minimise hits. The Moe Clan is attacking with size 8 missiles, larger than the size 6 fired at the King Edward II.
Fast scout survives two volleys of 8 missiles, with an interception chance of 53% the fire controls are reset to 2v1 mode. A third volley is targeted at the freighter and having accelerated to defend itself fast scout is no longer close enough and the freighter is destroyed by a single volley of 8 missiles, each with a strength 8 warhead – double the warhead of most ordnance in the empire.
0508 10:36
After managing to stave off on going bombardment the magazines of Fast Attack finally run dry. The ships were never designed for sustained combat with only 155 missiles on board and the end looks inevitable.
Over the course of the next 16 minutes Fast Scout endures 19 hits, suffering almost complete armour failure and massive internal damage that has slowed the ship to just 2500 km/s. The hostiles are now easily in a position to overhaul her whilst the combat Task Group Striker Bravo is still 430m k distant.
0508 13:01
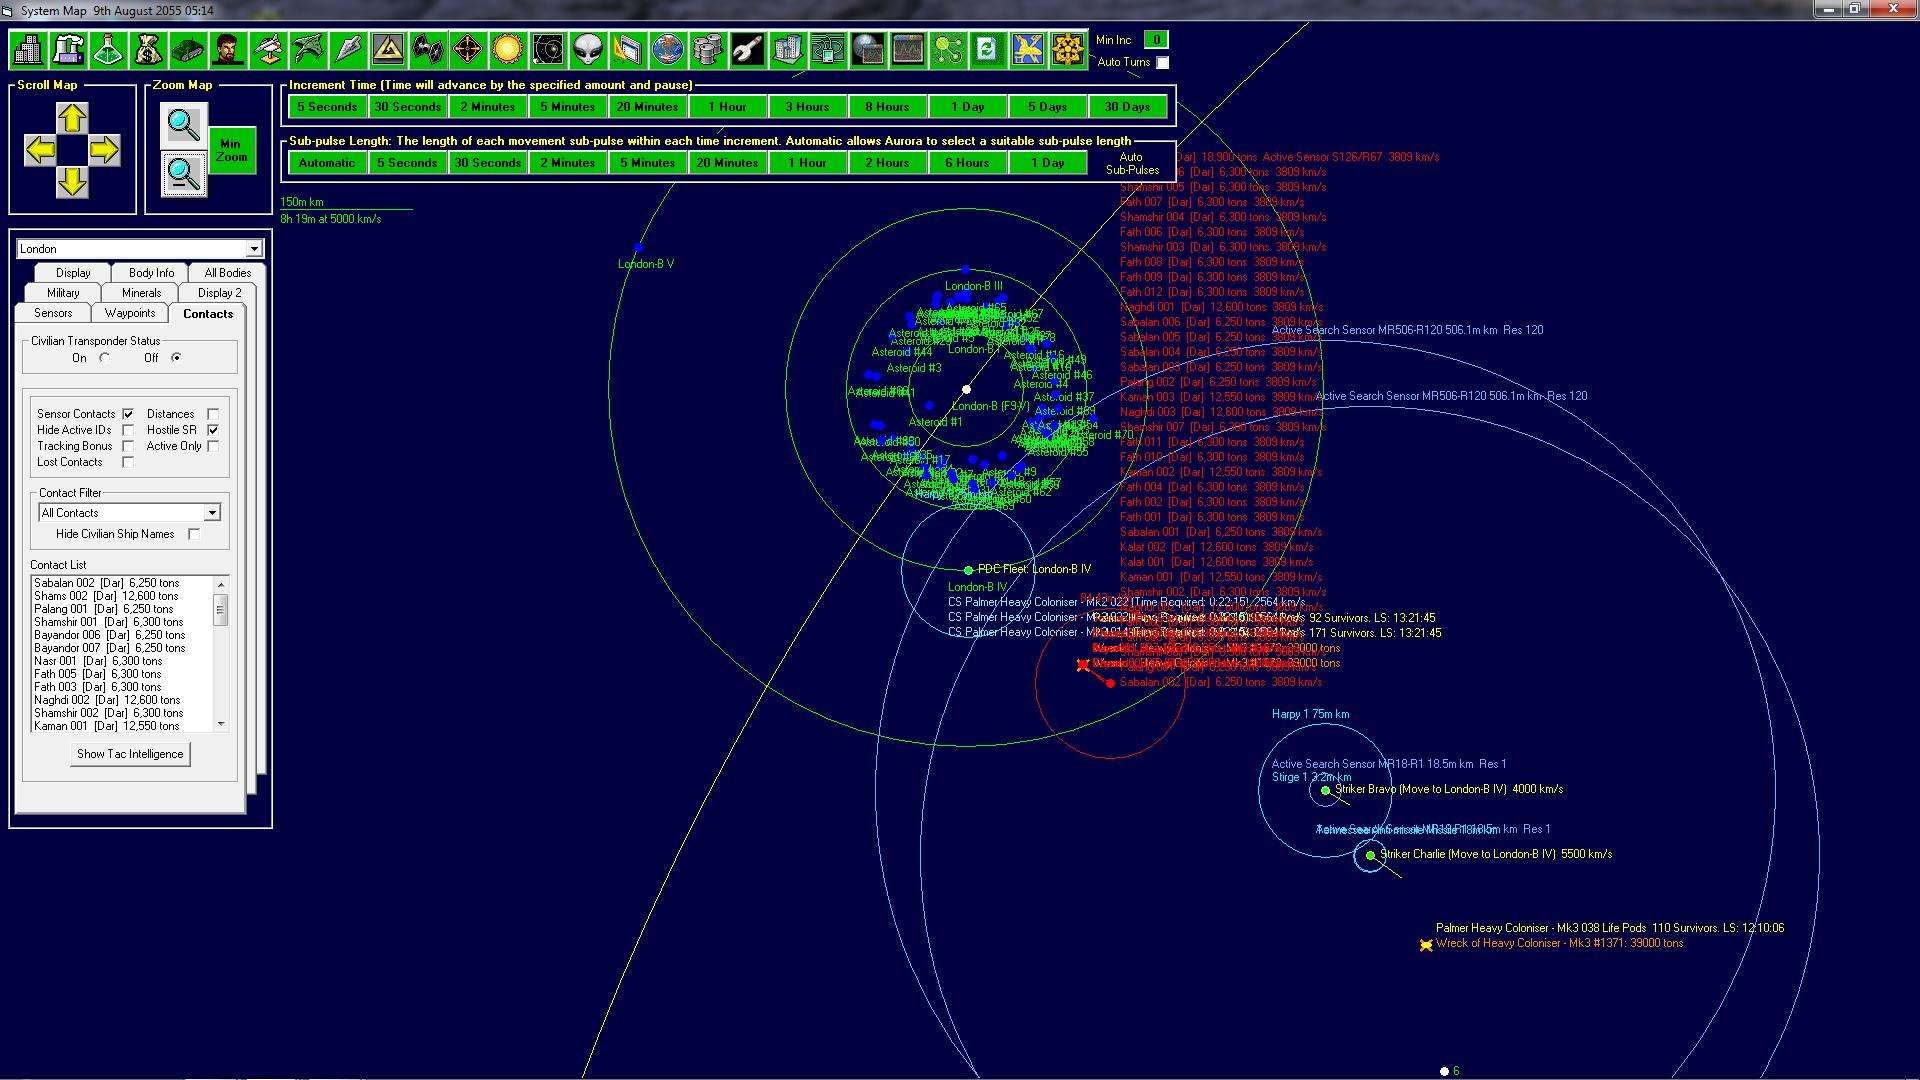
No more inbound missiles have been seen by fast scout Bravo and after some intensive work the depleted crew has managed to repair two of its damaged magneto plasma drives, bringing its speed to 3000 km/s allowing it to begin to outpace the hostile fleet once more.
It is however noted with concern that, whilst the majority of the hostile fleet seems to remain intent on running down the Fast Scout, the 18,900 ton Damavand has made an about turn and appears to be headed for the largely undefended London B IV and its 51.7 million inhabitants.
0508 13:39
Fast Scout Bravo briefly picks up more thermal contacts before being hit by three more missiles, the third of which causes complete structural failure.
With the death of the Fast Scout the hostile fleet appears to turn its attention on Striker Bravo. In all, the Task Group of 15 ships is facing 44 contacts and a tonnage comparison of 120,000 v almost 375,000.
Given the size of the main body and the expectation of significant AMM fire it’s decided to take the Strike group in towards the smaller hostile contacts in the hope that the relatively small throw weight of missiles will still be able to overcome any defensive capabilities. Meanwhile Striker Charlie, equipped with the latest power boosted ICF dries continues to catch up with Striker Bravo.
0608 17:52
Despite the best efforts of Striker Bravo to maintain the attention of the hostiles all of the enemy have now turned their attention to the main population centre in London. Both task groups are racing to try and catch up with the hostiles but with the limited speed difference for Bravo and the extensive ground for Charlie to cover it looks like London is doomed.

0708 15:21
The hostile fleet catch and destroy a Palmer Heavy Coloniser, thankfully there were no colonists on board at the time. At this point I’ve realised that the civilians have been running with their Transponders on, the rest of the civilian shipping lines are promptly ordered to switch them off!
0908 02:56
The hostile fleet continues to close on the largely defenceless colony and continues to destroy the civilian shipping on route. However, with the destruction of two more colony ships the main hostile fleet appears to be once more turning its attention on Striker Bravo.
0908 13:00
Striker Bravo and the London PDC group complete a launch of all of their ASMs at the two target groups respectively.
With only 150 odd missiles in stock this is a pitiful volley against the incoming ships to London B IV and there is little doubt that this will prove effective. It is however hoped that the missiles may be able to slow the hostiles down long enough for Striker Bravo to get their attention as it has done so with the main hostile fleet.
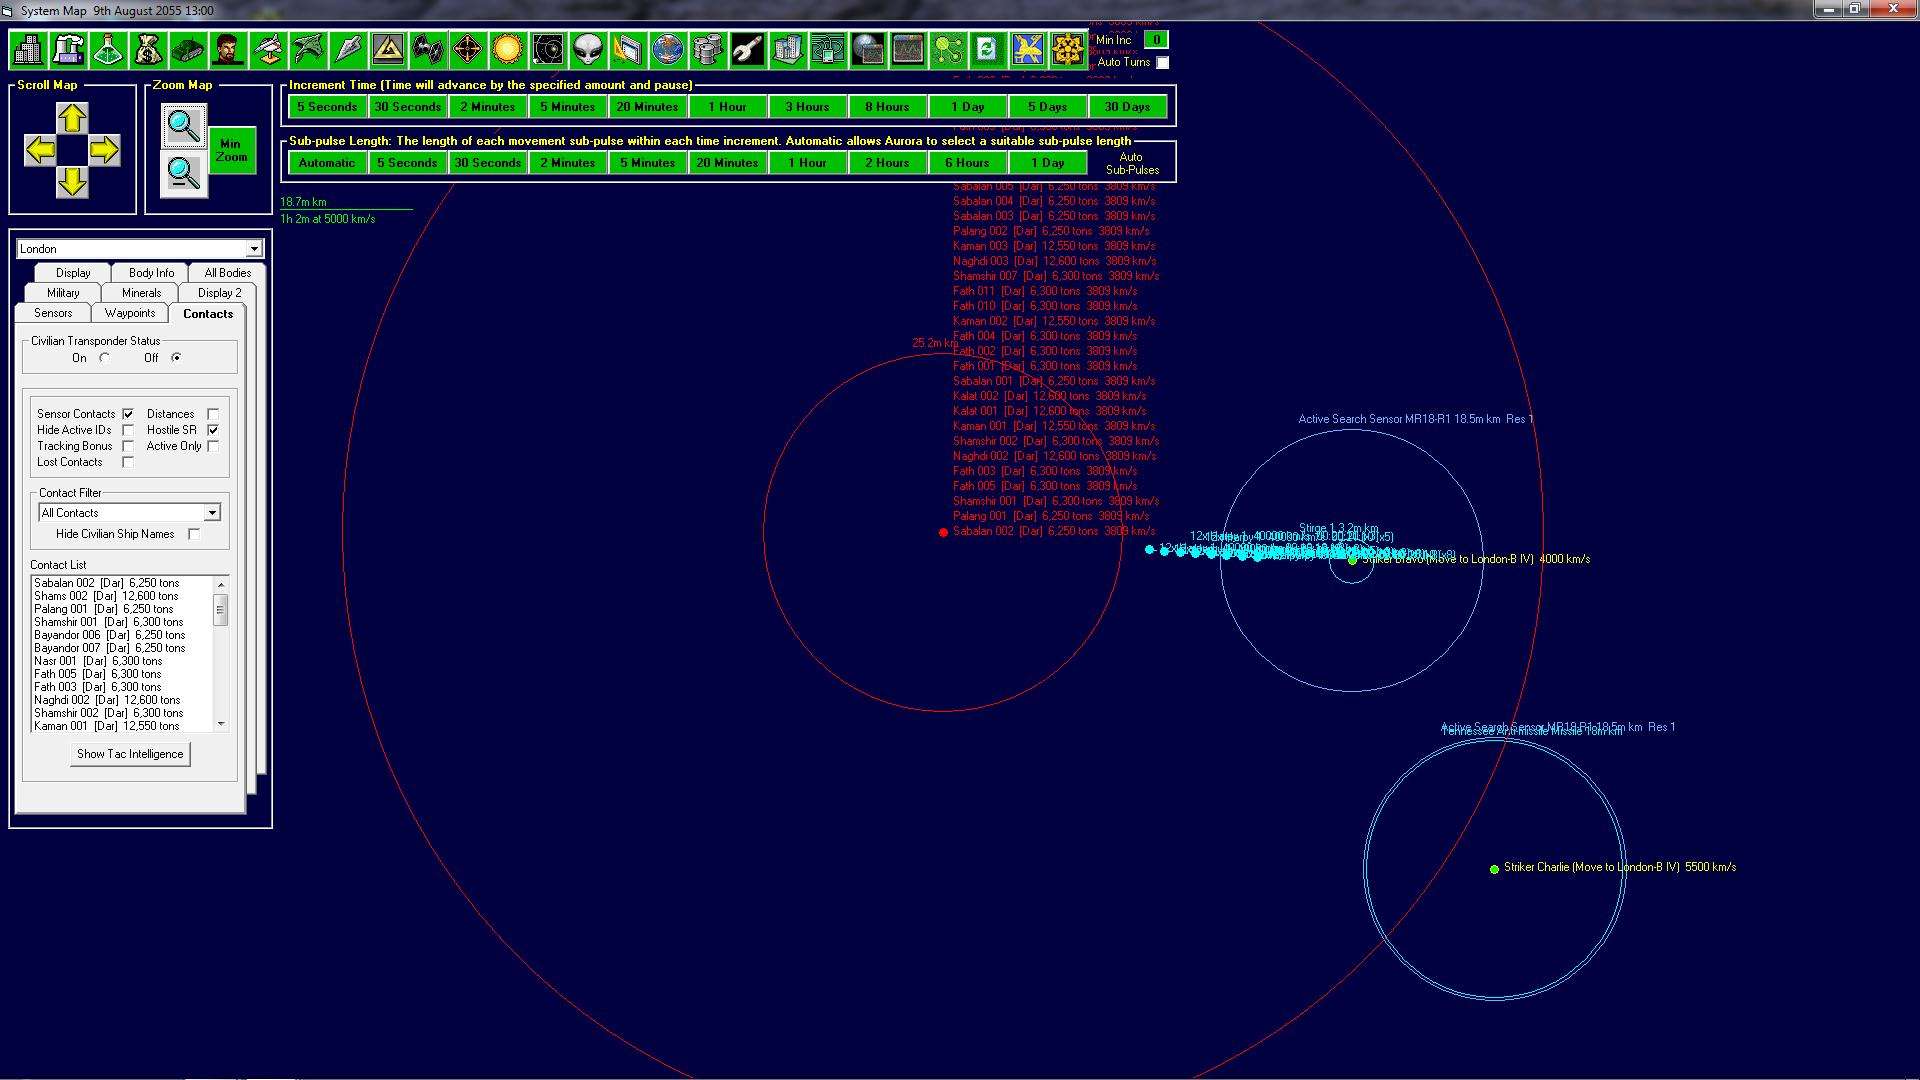
0908 13:11
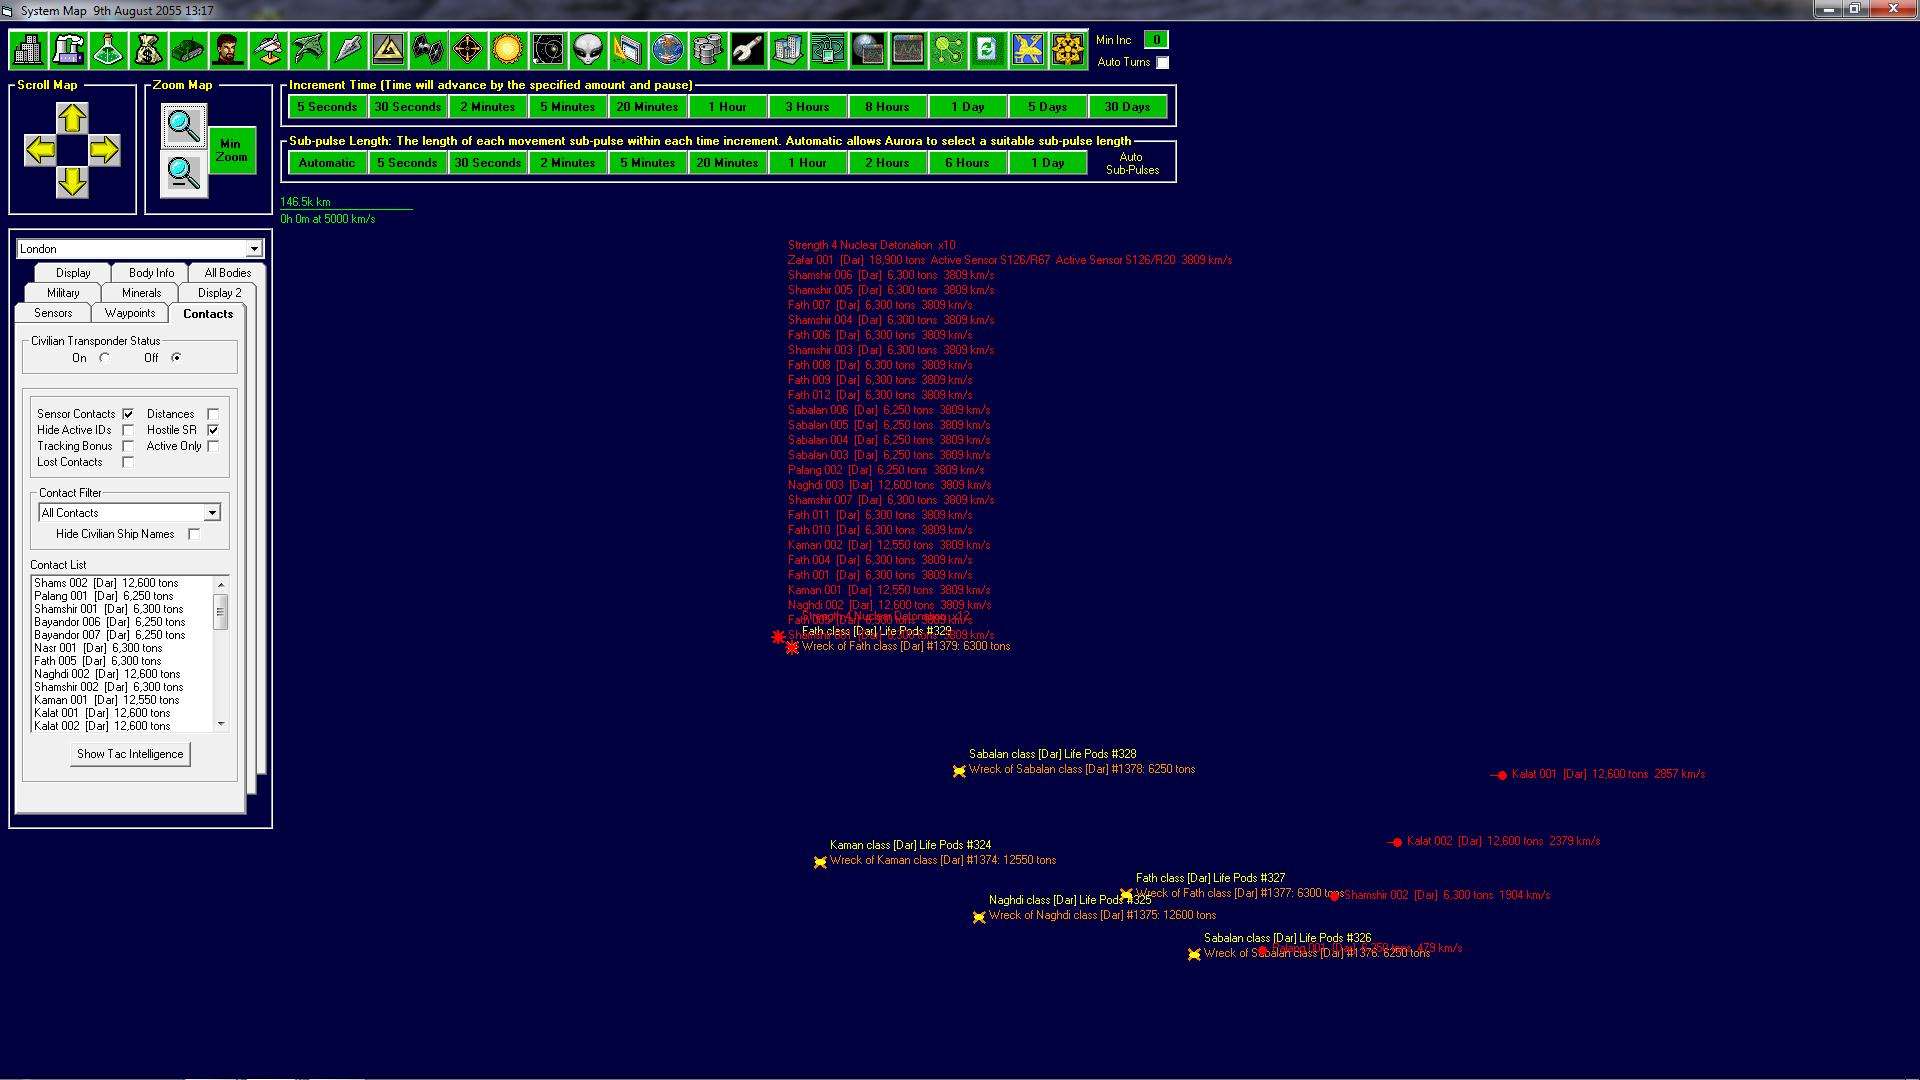
The first wave of missiles from Striker Bravo reaches the hostile fleet. Whilst no AMM intercepts appear to have occurred, as feared, the missiles are caught by a massive barrage of point blank defence fire which destroys fully 6/8th of the entire wave. Despite the losses the remaining missiles do hit and several ships start to vent atmosphere. The missiles from the PDC seem to be faring better with no intercepts or final defensive fire to stop the waves of 20 missiles hitting home.
Two waves in and it seems the crew of the hostile ships have got themselves organised with strength 1 explosions being detected, indicating that Striker Bravo’s volleys are being further eroded by AMM fire as well.
Despite the heavy defensive fires, missiles continue to find their way through and the hostile fleet starts to take damage and loose vessels. When the dust settles there are six wrecks and four other ships have slowed to well below their maximum speeds.
Meanwhile the PDC fleet salvoes have largely managed to connect with their target, however whilst most are now streaming atmosphere the volleys have not been large enough to destroy any of the vessels and they continue to approach the now defenceless colony.
With empty tubes in all of Striker Bravo’s attack ships the Task Group is split in two, sending the missile boats back to Earth to reload whilst the AMM ships continue on to London IV in the hope of being able to supply some support. Meanwhile Striker Charlie has closed significantly and is ordered to engage the few ships still moving towards Striker Bravo before also heading towards London B IV.
0908 14:59
Shortly after the orders are issued the main hostile fleet appears to change its mind and moves to intercept the detached AMM ships from Striker Bravo. The ships are promptly ordered to set a course to take the fleet in system, away from London B IV whilst Striker Charlie is ordered to box round the bottom of the hostile fleet in an effort to avoid drawing fire before moving towards London B IV.
0908 15:34
With the active sensors on the PDCs off there is little warning before a wave of missiles slam into one of the three commercial colony ships in orbit at London B IV. None of the three ships have completed their unloading operations and tens of thousands of colonist remain on board. The PDCs are ordered to activate their sensors in an effort to draw the fire of the fast encroaching ships. Sensors detect several more incoming waves and the crew of Resolute are left to watch helplessly as the missiles continue inbound unopposed. Given the performance of just 5 tubes and more limited sensors on the fast scout it’s likely that Resolute would have been able to intercept all of the incoming missiles had its’ stock of AMMs actually been delivered.
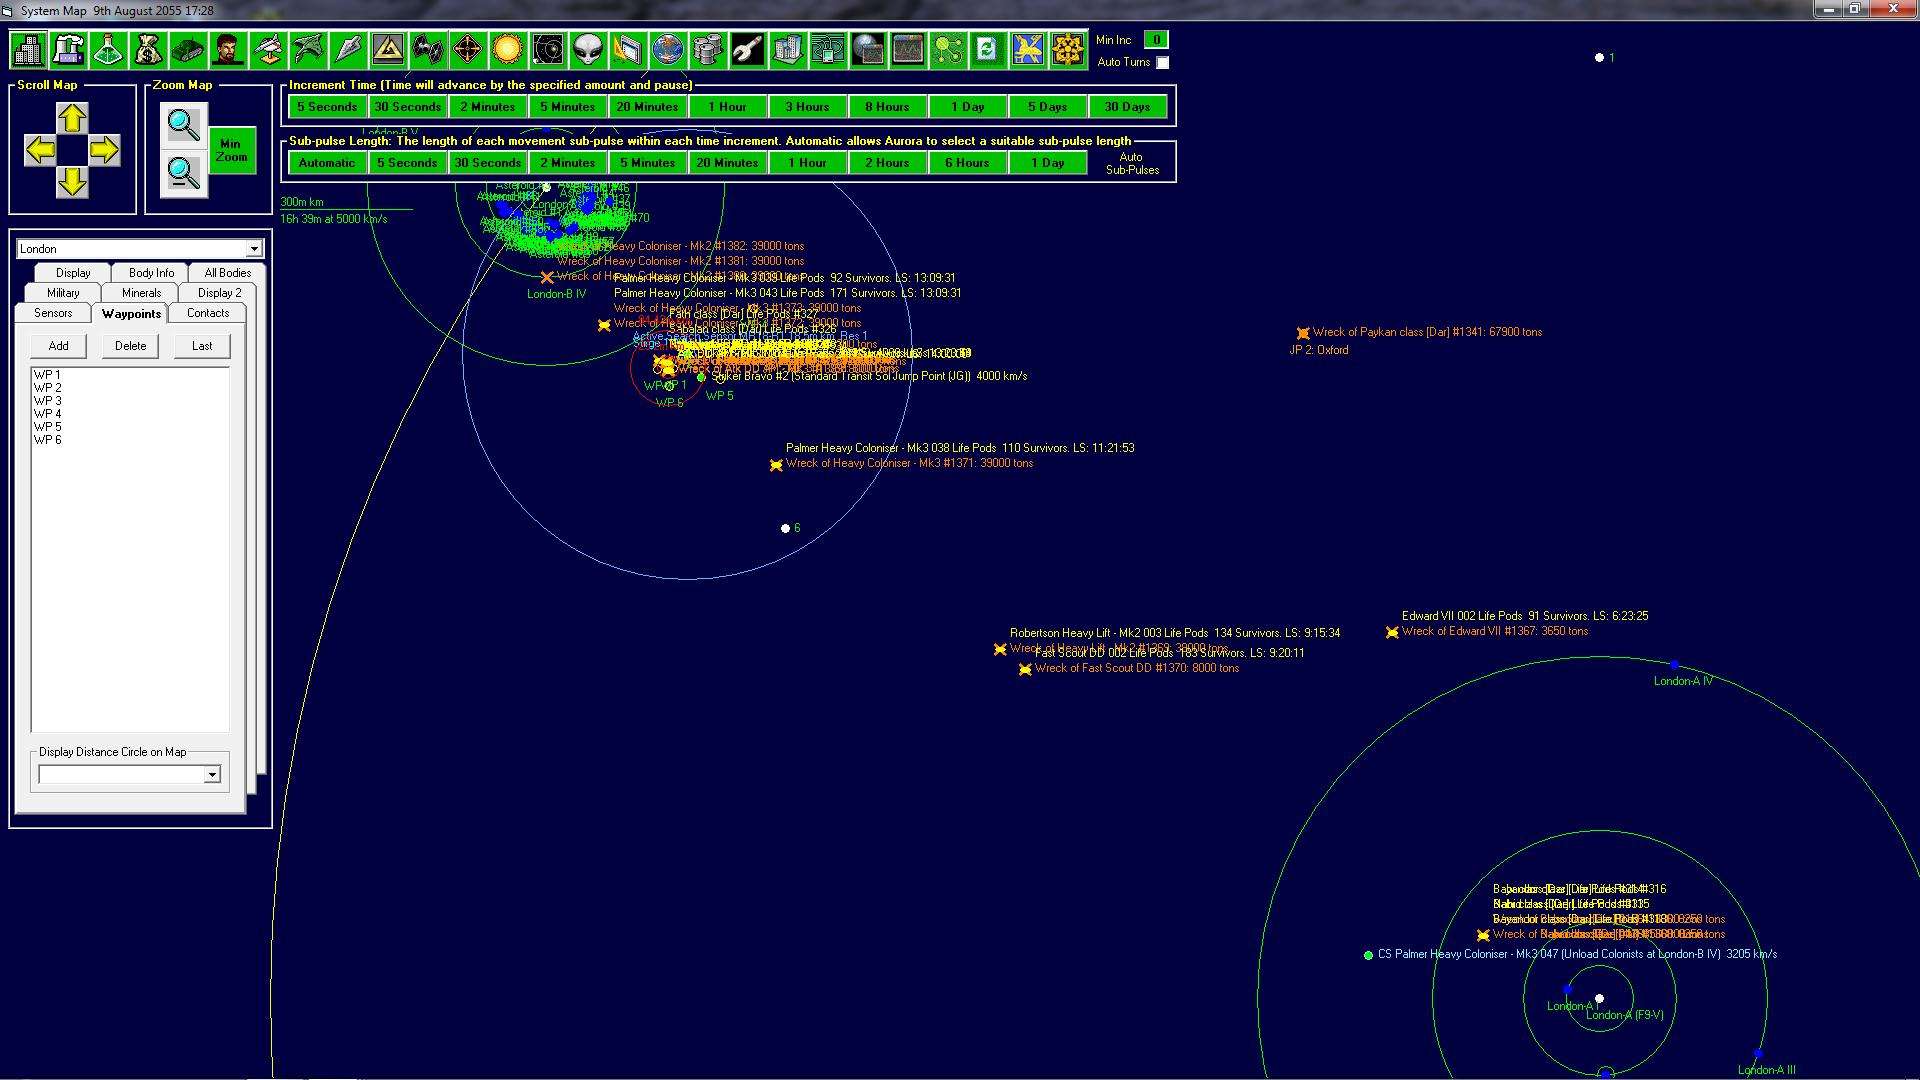
Three waves slam into the colony ships, destroying two of them and leaving the third crippled. A further wave goes on to slam into the colony itself. Multiple strength 8 detonations hit Resolute whilst there is widespread damage to infrastructure and over 2 million civilian casualties.
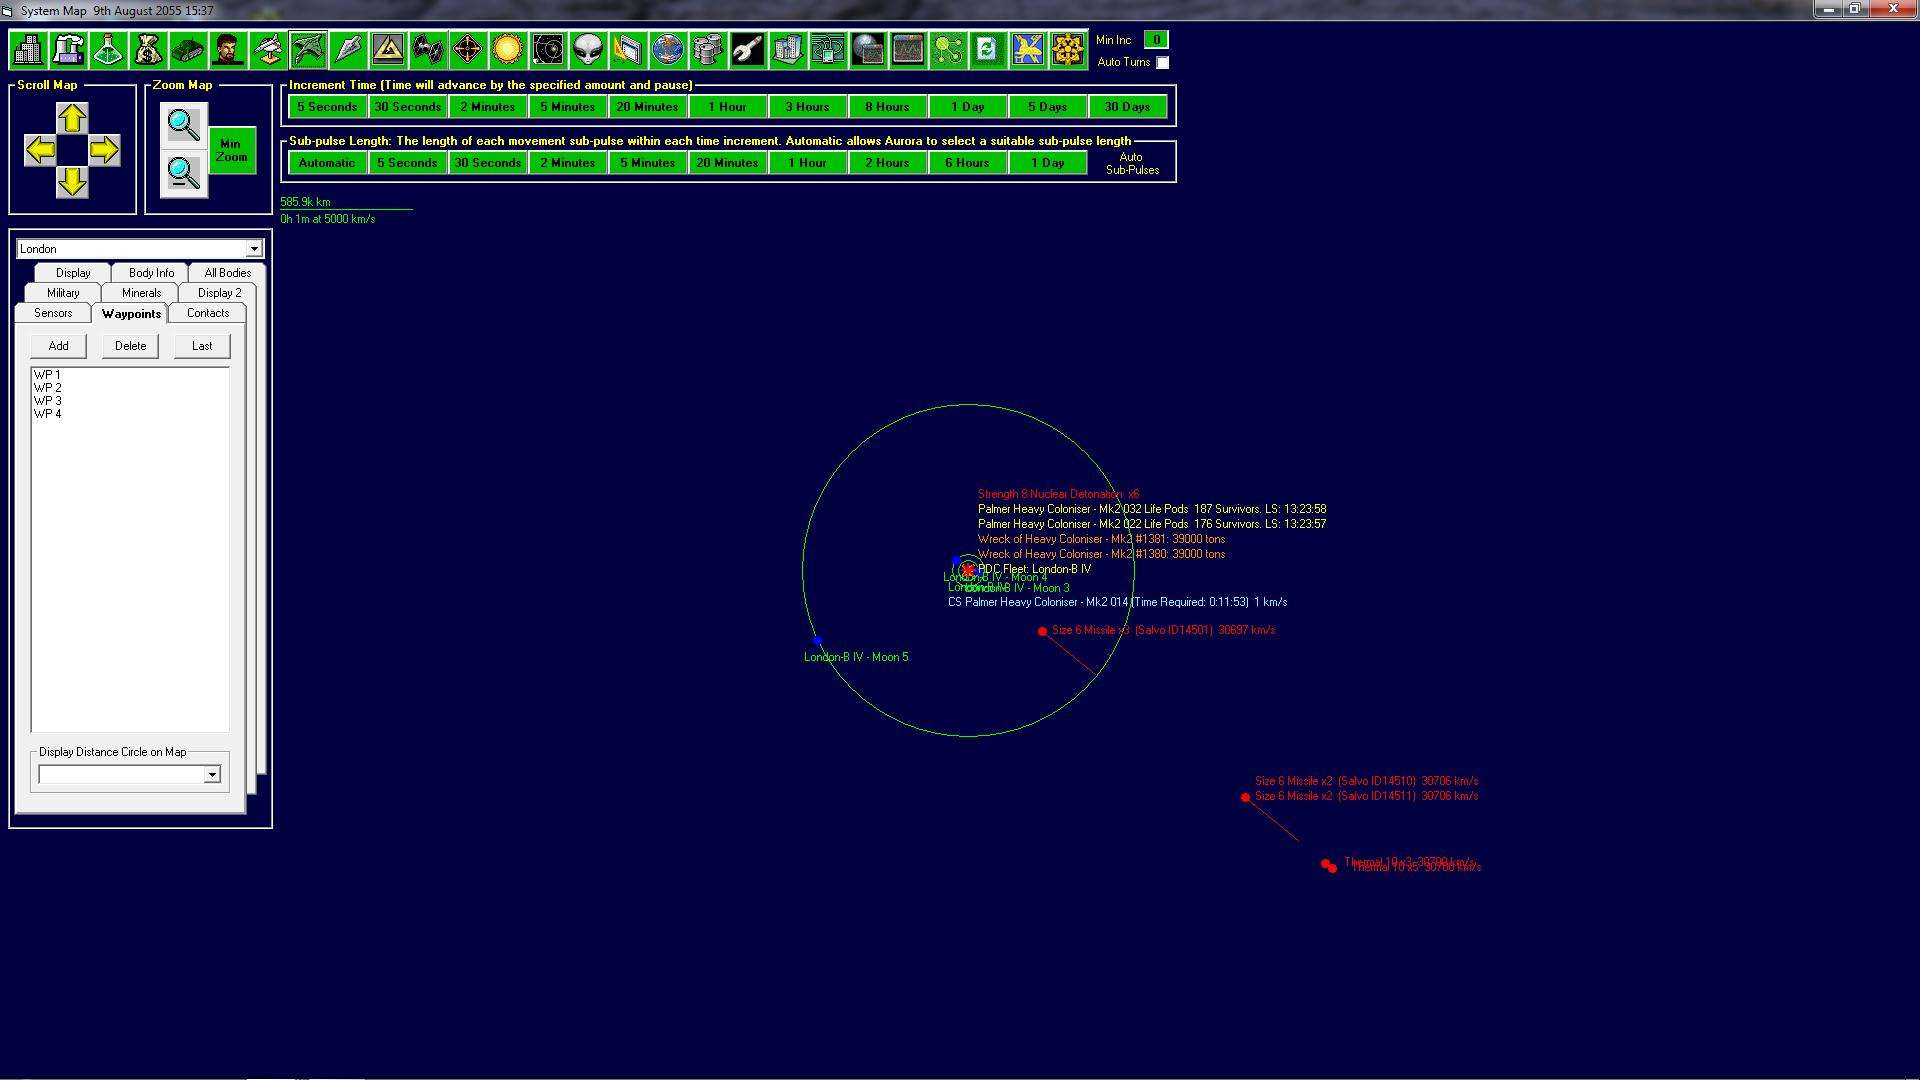
London B IV goes on to suffer multiple additional hits and the colony is eventually lost. Scan data seems to indicate that two of the PDCs were lost and one has been taken over by the Moe Clan however there was no evidence of drop ships and no notification of any invasion. The Imperial Navy will be back to liberate what remains of the colony sometime in the future.
0908 16:32
Intent on extracting revenge, Striker Charlie switches two fire controls on each vessel to offensive mode and moves in to attack the ships separated from the main fleet. The extreme range of the precursor AMMs makes them a very viable alternative weapon. The first volleys land and one of the already damaged hostiles is destroyed.
Despite the extreme close range there is no return missile fire, suggesting that much of the fleet is energy weapon equipped and that the few incoming waves have largely depleted their stores. It’s decided not to test this theory though and Striker Bravo and Charlie are ordered to join up so that Charlie can switch all of its tubes to offensive measures whilst Bravo provides cover. Reluctantly Charlie breaks off the attack having already destroyed two hostiles.
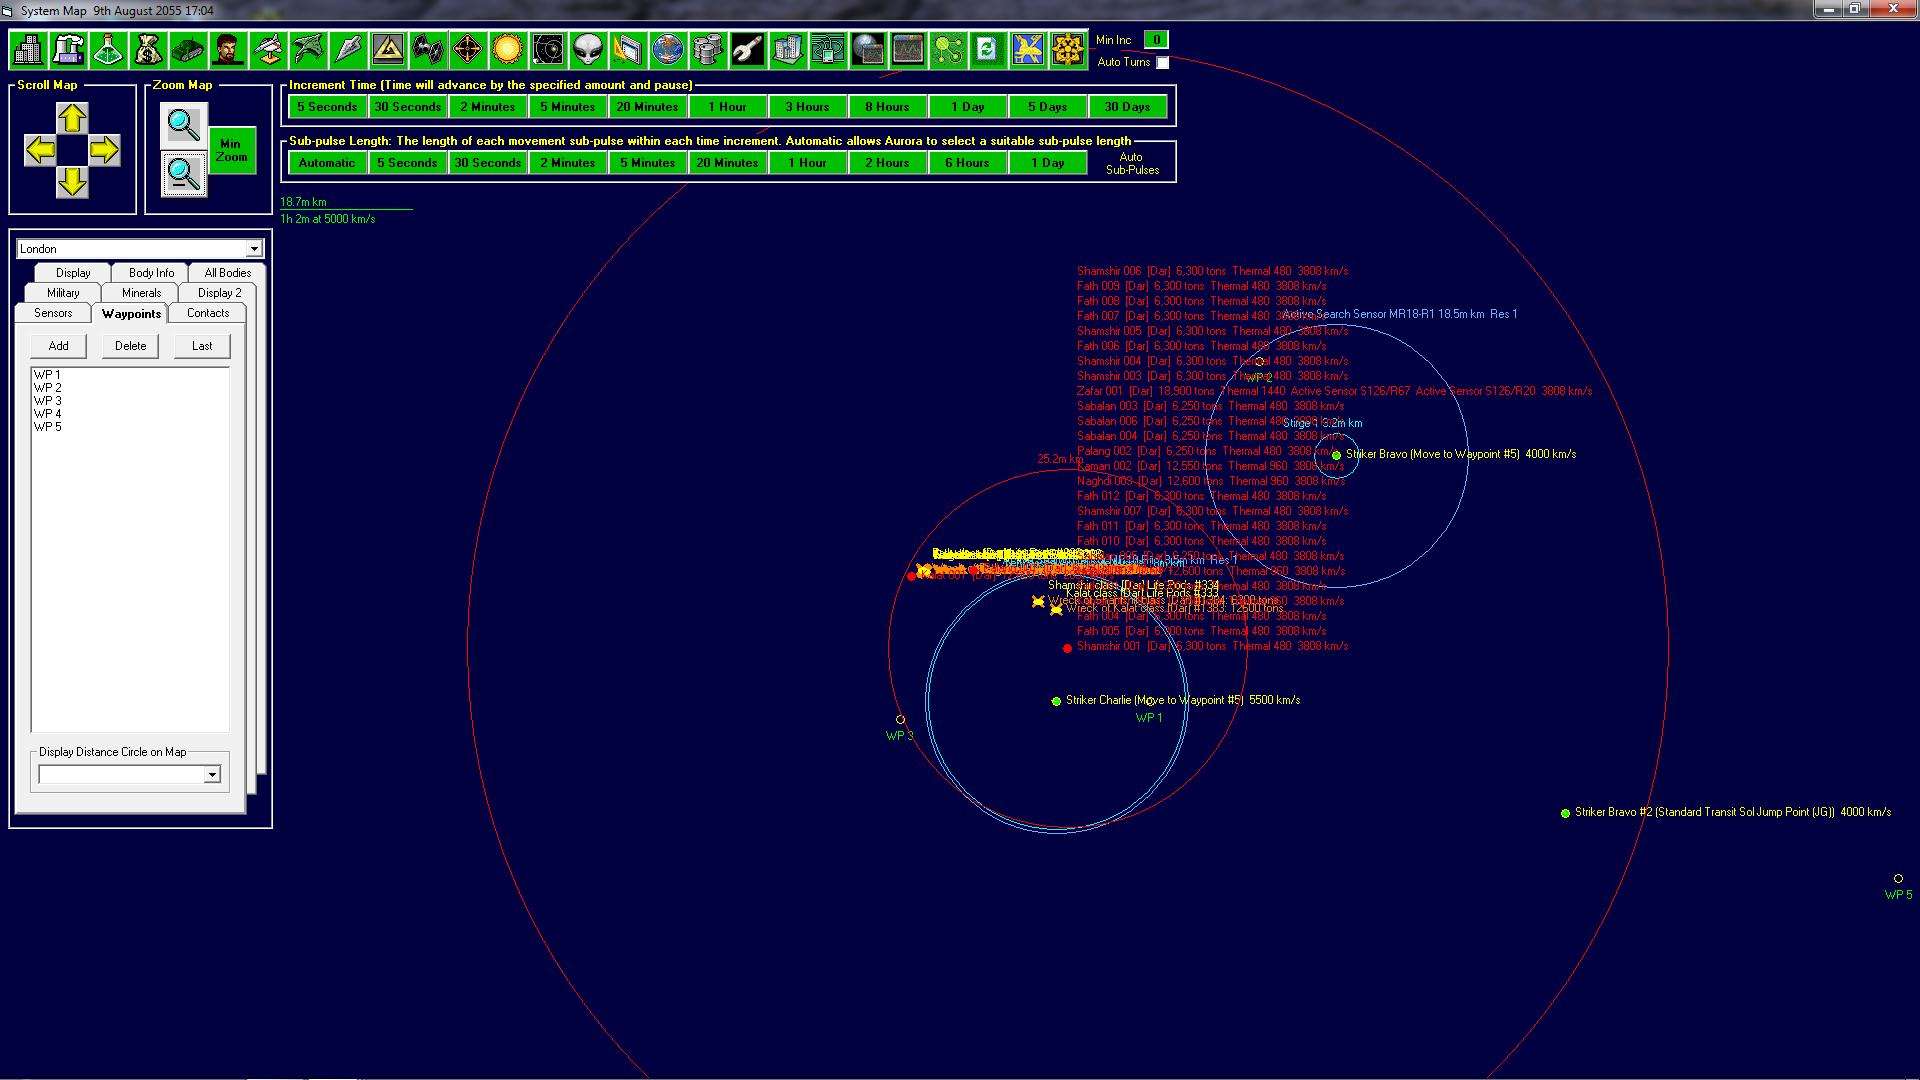
0908 17:12
Striker Charlie looks to be getting too close to the hostiles and is ordered to turn away. The completely inexperienced crew take over a minute and a half to turn the ships and by that time it’s apparent that they are too late with the Task group coming under fire from massive waves of size 1 missiles. All of the tubes are immediately switched back to PD mode, it’s likely that there will be plenty of leakers and this defence is going to burn up the precious stocks of AMMs that can be used offensively.
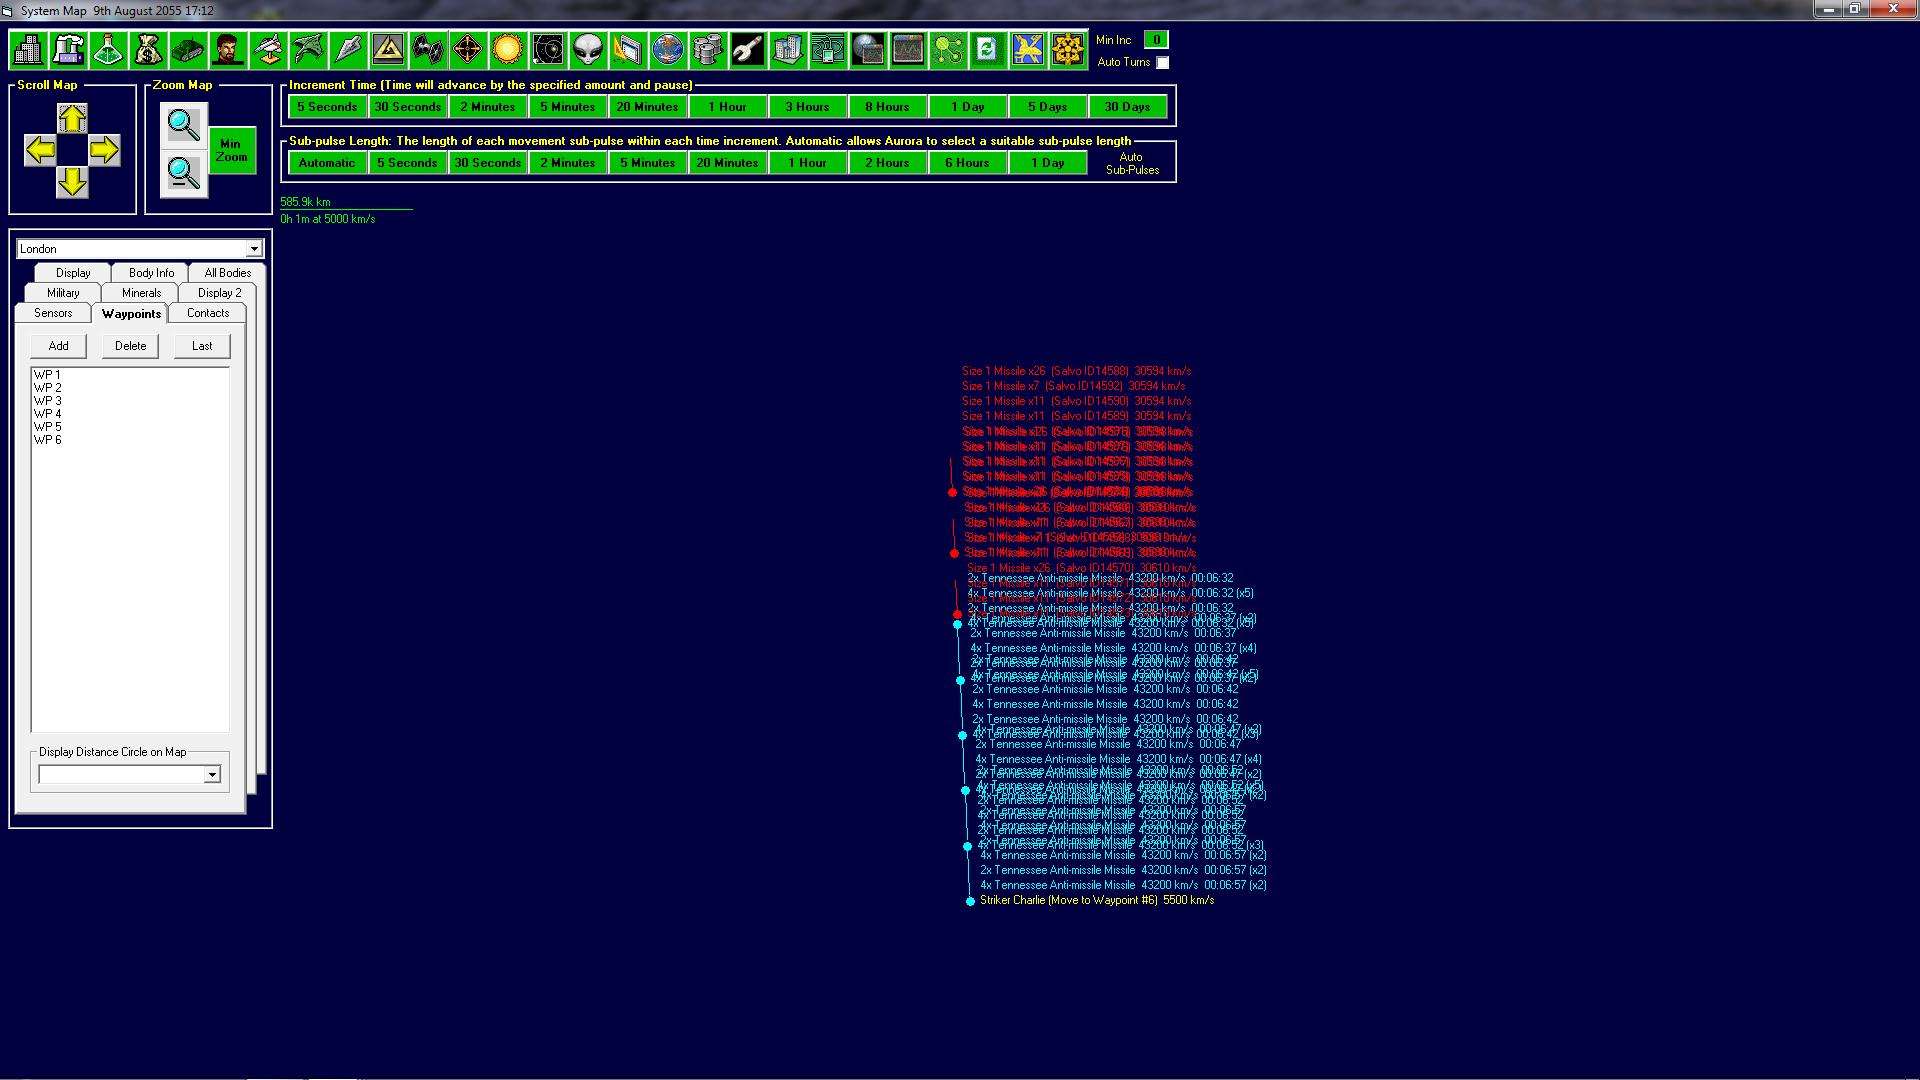
With seven volleys of 125 missiles each detected as incoming things are not looking good for Striker Charlie. The PD tubes hum as wave after wave of AMMs are launched but with a combined launch rate of only 80 missiles every 10 seconds it’s clear that many are going to get through.
0908 17:14
Having been pounded by multiple strikes ATK AM 03 drops out of formation with engine damage and multiple destroyed systems. Shortly thereafter ATK AM 02 drops out of formation after a series of lucky hits manage to penetrate its armour with relatively little spread. 02 Takes a further 22 hits from the next salvo and continues to slow.
The final salvo slams into the fleet and one missile reaches the main magazine on ATK AM 01 setting off an internal explosion that rips the ship apart. Whilst no more volleys are incoming one of the Imperial Navy’s most modern warships has been destroyed, two others have been heavily damaged and almost all of the remaining offensive weaponry in the system depleted. This has been a terrible development in the battle. Worse still ATK AM 02 has suffered significant engine damage and is no longer able to outpace the hostile fleet bearing down on the group.
0908 17:16
The respite is short lived with more waves of size one missiles incoming on the already battered task group. With one ship down and multiple launchers offline on another ship it’s looking like the end for Striker Charlie.
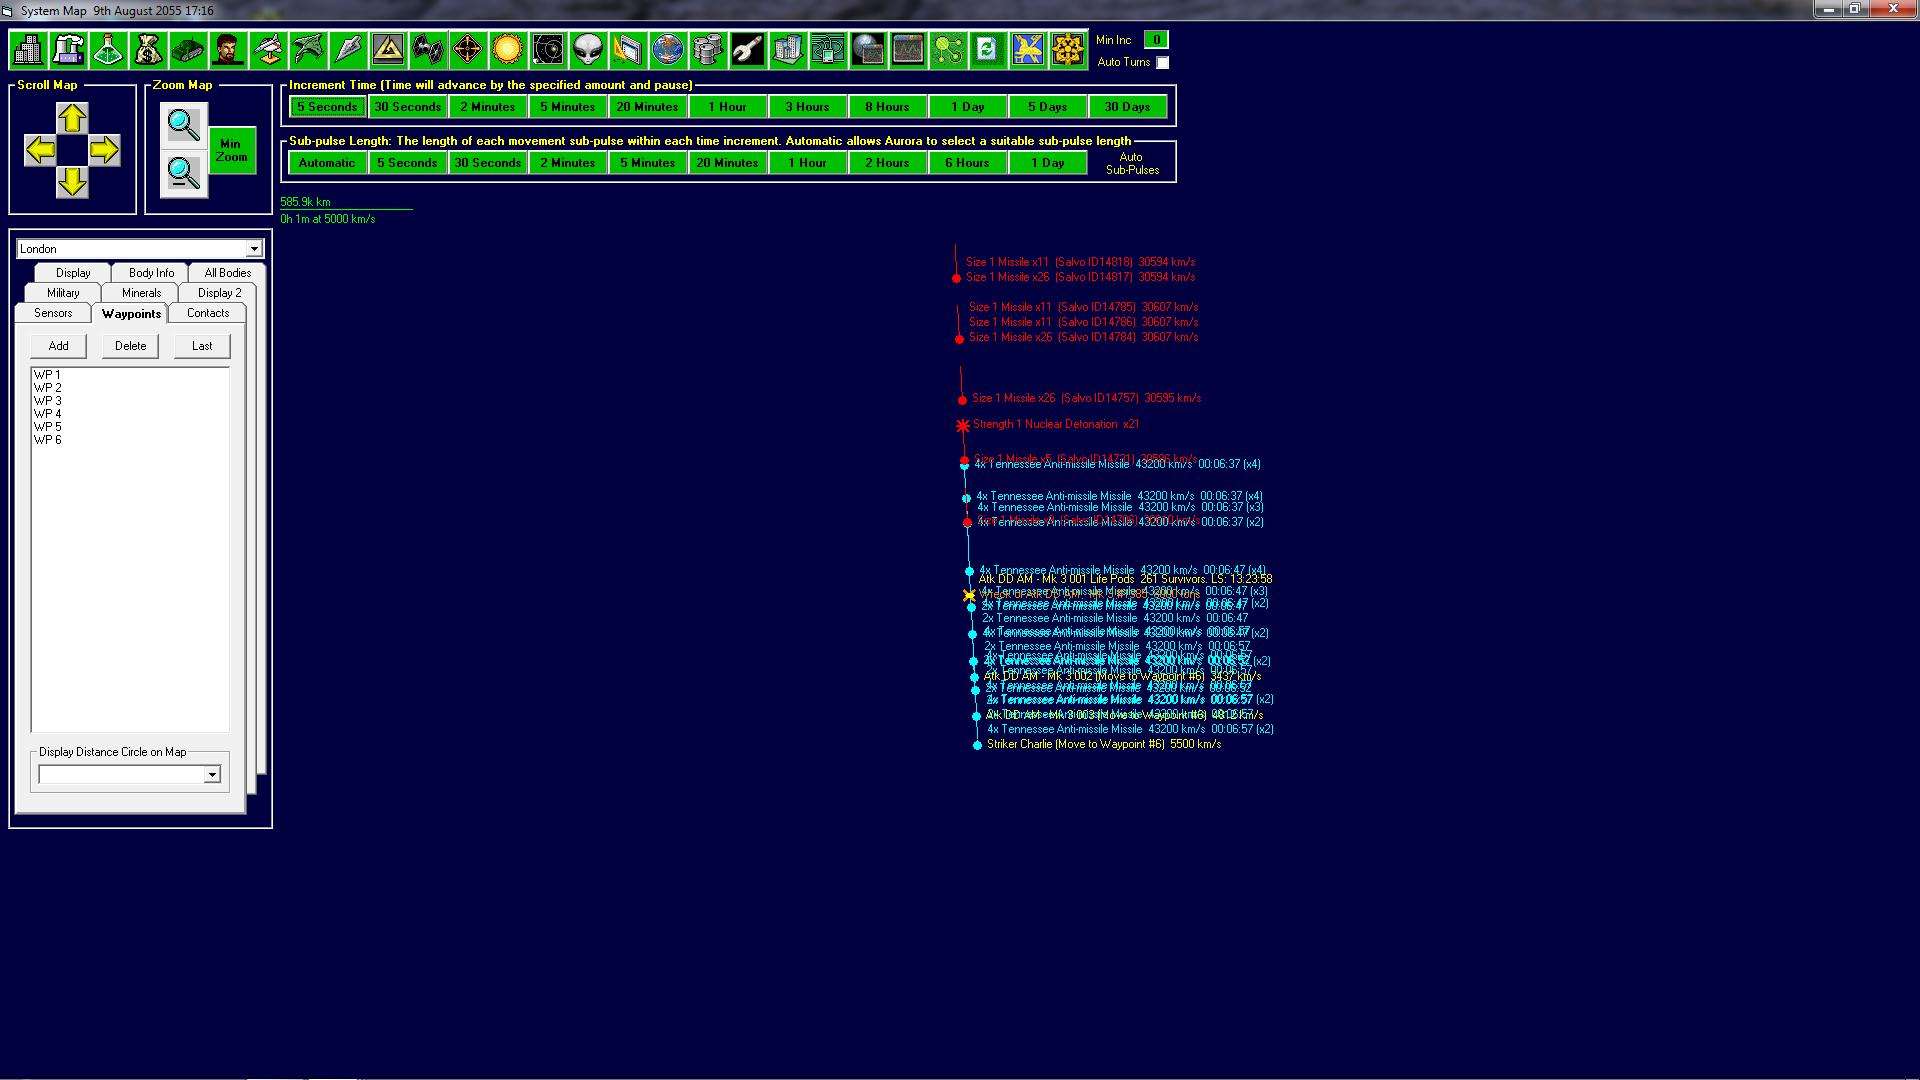
The size of the volleys quickly grows and more and more missiles start to work their way through the AMM web.
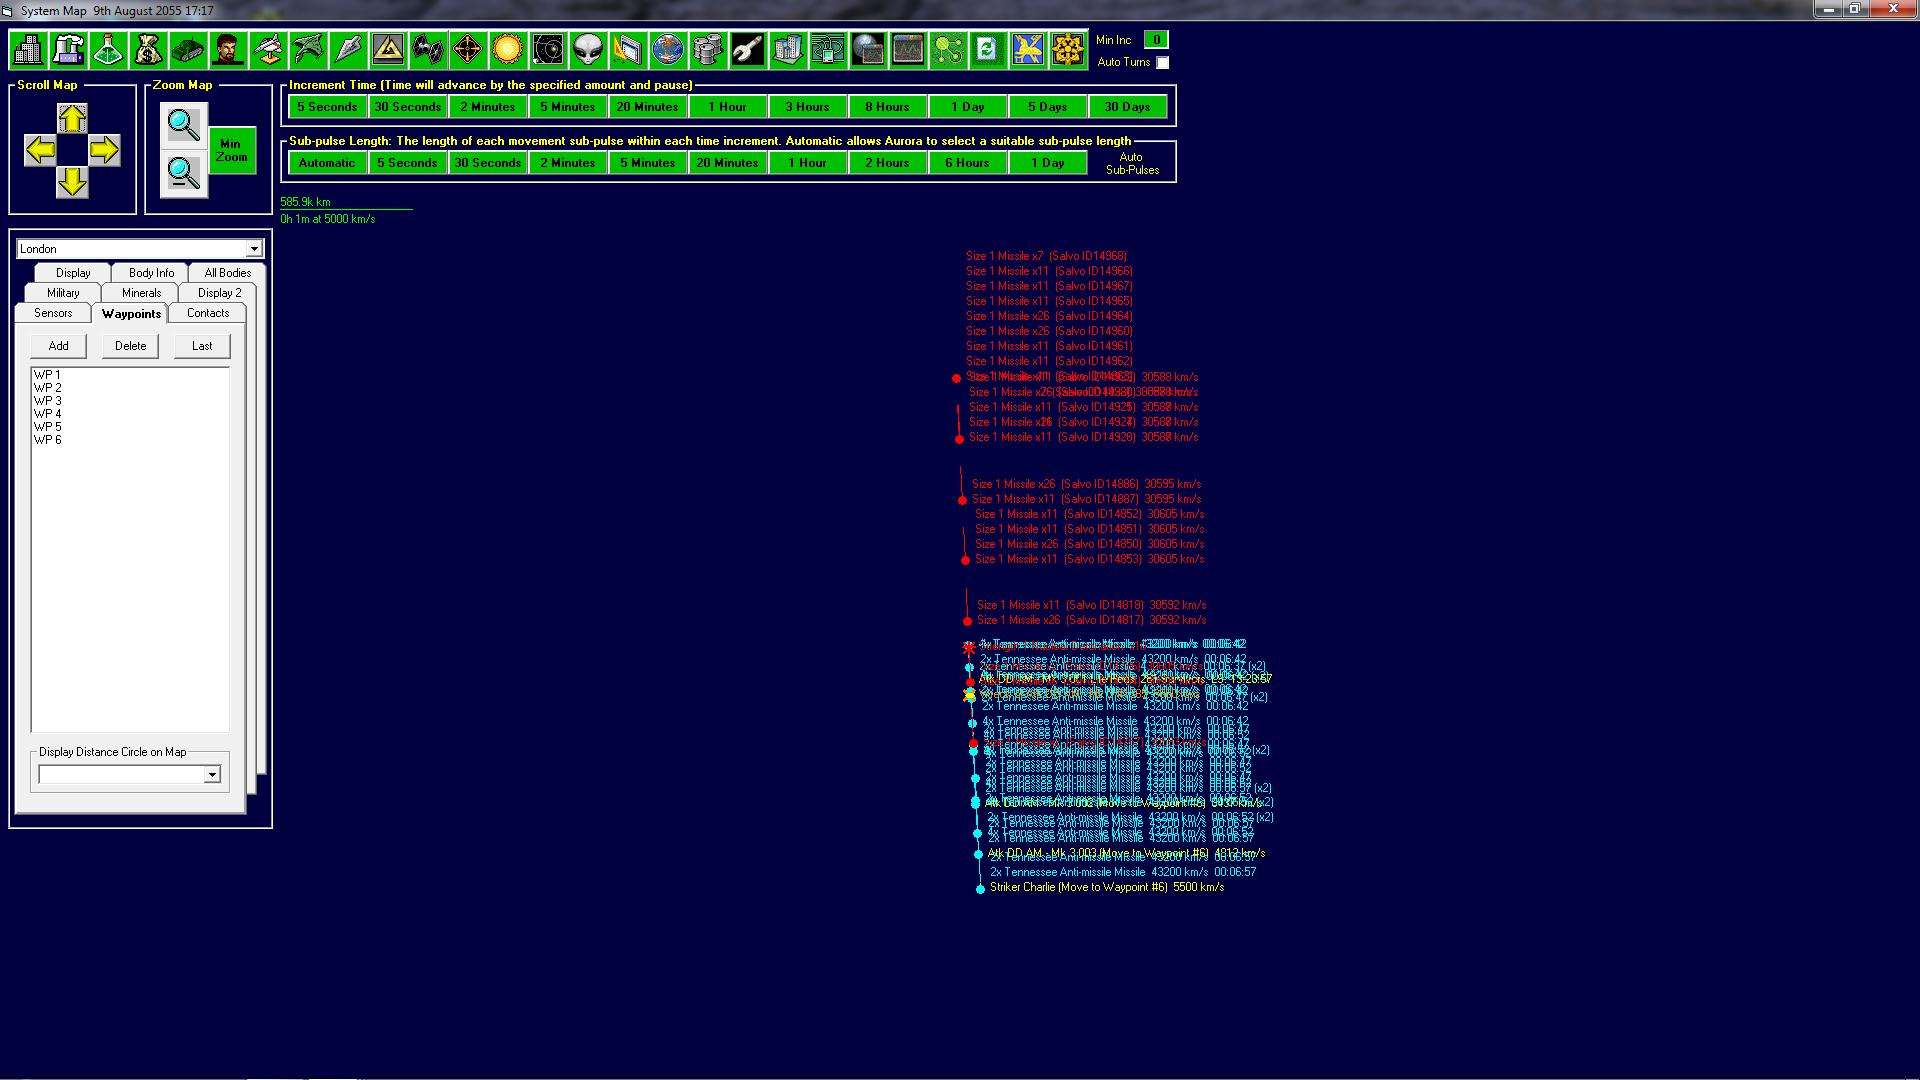
0908 17:18
The fifth salvo to hit knocks out the last of the Task Group anti-missile sensors leaving them blind to the remaining incoming volleys. ATK AM 02 breaks under the hail of nuclear explosions and ATK AM 03 is slowed to a mere 2750 km/s whilst ATK AM 04 is down to just 2062 km/s. On-going secondary explosions from the magazines are leading to consideration of needing to armour them in future designs.
5 seconds later ATK AM 03 explodes in a hail of 40 impacts.
30 seconds after that the Task Group’s leader starts to suffer hits of 22 missiles at a time. The fourth volley finally breaches the heavier armour and courses minor internal damage. There is no way of knowing how many more waves are on the way. The sixth finally starts to slow the ship and also manage to offline its jump engine whilst two more waves impact on ATK AM 04, destroying all of its engines. 15 seconds later another volley of 11 missiles destroys the ship.
Three more waves hammer into the task leader but it manages to limp on, slowed to just 2062 km/s. Repair crews move frantically to try and online some of the engines and get the ship ahead of the hostiles.
After five minutes off running with no further attacks the crew are starting to think they may make it out of it when, without 52 further missiles tear the ship apart.
What started as a bad encounter and an expected burn of ordnance has turned into a route with the loss of four modern warships that will take over a year to replace. The tide of the battle is undoubtedly swinging in the favour of the Moe Clan. Striker Bravo continues to run for Sol with its sensors off whilst the AMM detachment are instructed to move back towards Oxford in the hope of pulling the enemy with them to buy time for the Imperial Navy’s remaining combat ships to get into action.
The poor preparation of the fleet and the colony has meant that the empire has lost control of London and also a key resource in the tritanium mines located on London B IV. The very bad timing of the refit of Striker Alpha has also meant that the Navy has been unable to continue the fight and, if the hostile fleet does not make the jump to Sol it could be looking at a very painful jump point assault with relatively limited stocks of missiles free on Earth.


